


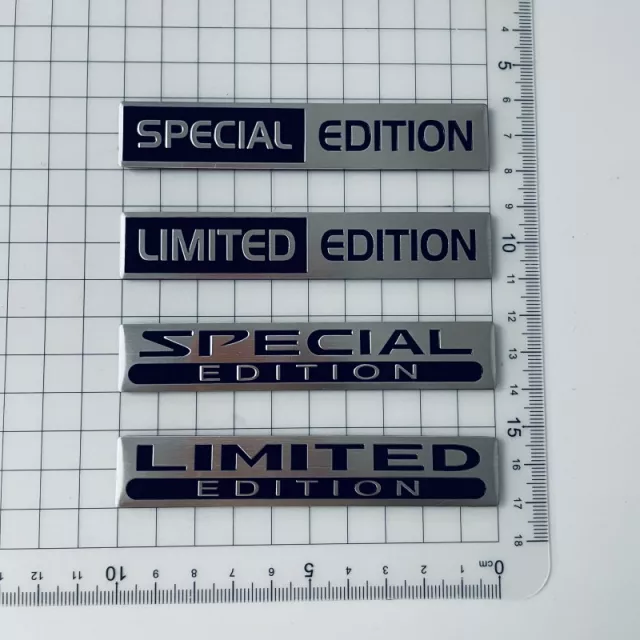
3D Limited Edition Metal Emblem: BMW, Audi, Mercedes
3D Metal “LIMITED EDITION” Emblem Sticker: A Small Badge That Changes the Whole Look
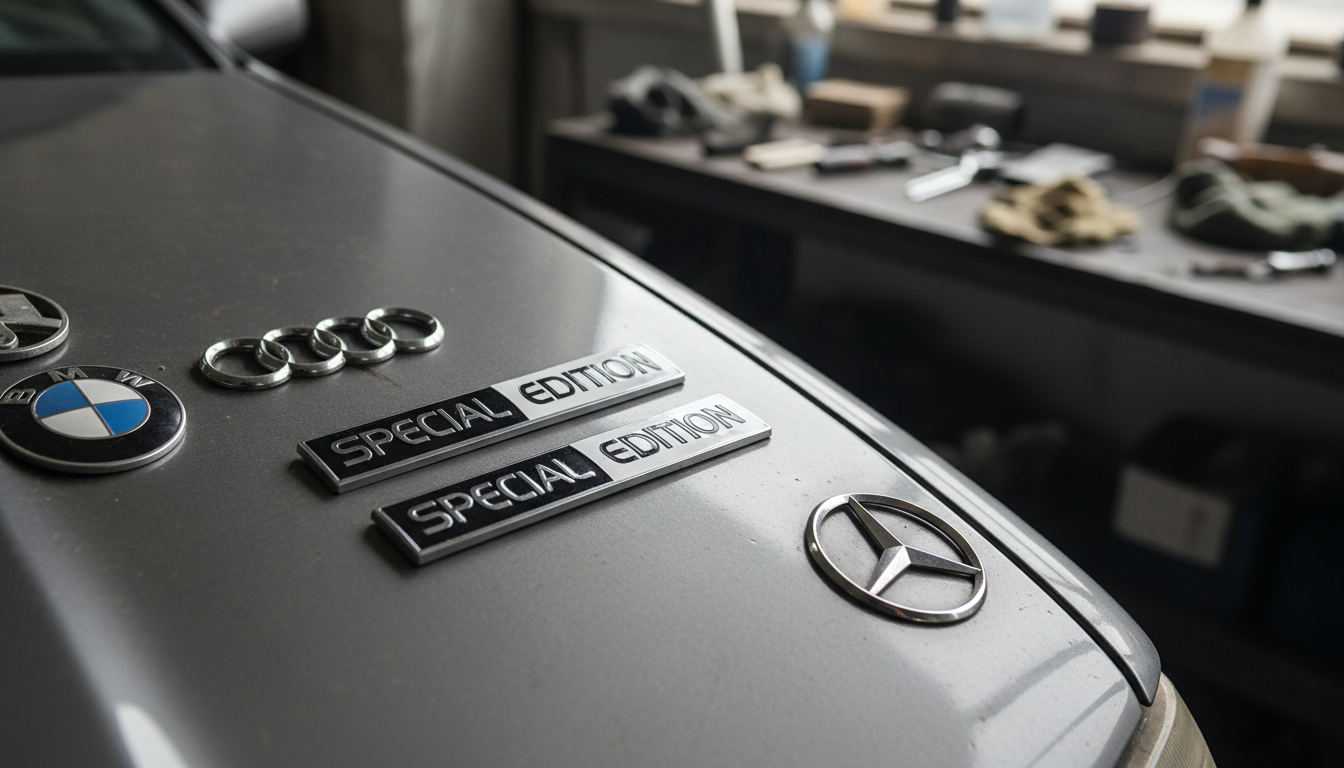
A subtle badge can change the feel of a grille, trunk lid, fender, or interior trim without permanent modifications. This 3D metal “LIMITED EDITION” emblem sticker is designed for BMW, Audi, and Mercedes-Benz styling, offering a clean, premium look that suits both daily drivers and weekend builds. It’s the kind of detail that reads “intentional” up close—without shouting from across the parking lot.
Quick look: what the emblem adds
- 3D raised, metallic finish that reads like a small badge rather than a flat decal.
- “LIMITED EDITION” design for a sportier, more customized appearance.
- Flexible placement as an exterior accent (body panels) or interior accent (dash/console trim) depending on where it fits best.
- Low-commitment upgrade compared with drilling, riveting, or replacing factory trim pieces.
Best placement ideas on BMW, Audi, and Mercedes-Benz
Placement makes the difference between “factory-clean” and “afterthought.” The goal is to pick a smooth, visible surface that complements existing lines and badges.
- Rear trunk/boot area: near model lettering or on the opposite side for visual balance.
- Front grille surround: only on smooth, flat sections where adhesive can fully contact.
- Fender area: behind the front wheel arch on flat paintwork (avoid heavy curves).
- Interior: center console trim, door-sill trim, or dashboard accent strips.
- Avoid high-heat or high-abrasion zones: directly beside exhaust outlets, on rubber seals, or where clothing/bags constantly rub.
If the panel has strong curvature or deep texture, the emblem may look slightly “bridged” at the edges. When in doubt, choose a flatter area or move the placement a few inches until the base sits perfectly flush.
Installation that looks factory-clean
The adhesive is only as good as the surface underneath it. A careful install prevents edge lift, crooked placement, and premature failure—especially on daily-driven cars that see sun, rain, and frequent washing.
- Test the position first: hold it in place and step back to check alignment and spacing with nearby badges/creases.
- Clean the surface: remove wax, road film, and silicone-based dressings so the adhesive bonds to paint/trim rather than residue.
- Dry completely: moisture trapped under the sticker can weaken bonding and create uneven edges.
- Apply steady pressure: press across the full face (especially edges) to prevent lifting over time.
- Give it time to set: avoid washing the area immediately after installation; let the adhesive fully bond.
Surface prep checklist by location
| Location | What to clean off | Prep tip before applying |
|---|---|---|
| Painted body panel (trunk/fender) | Wax, sealant, dust, road film | Use a paint-safe cleaner; ensure the panel is cool and fully dry |
| Gloss black trim | Finger oils, dressing, dust | Wipe gently to avoid micro-scratches; confirm the area is perfectly smooth |
| Chrome trim | Residue and water spots | Degrease lightly so the adhesive bonds evenly without edge lift |
| Interior plastic/trim | Oils, interior protectant | Avoid oily cleaners right before install; let the surface air out and dry |
For additional adhesive and surface-safe removal guidance, consult 3M. For general paint care and wash best practices that help keep trims and badges looking sharp, see Meguiar’s.
Durability and day-to-day care
Once installed on a properly prepped surface, a raised metal emblem can hold up well in normal driving conditions. Longevity comes down to washing habits, chemical exposure, and whether water pressure is aimed into the edges.
- Hand washing is the safest option around any raised emblem; use a soft mitt and avoid snagging edges.
- If using a pressure washer, keep distance and avoid blasting directly at the badge edges.
- Avoid aggressive solvents on or around the emblem; use mild car shampoo for routine cleaning.
- If edges start to lift, address it early: re-clean the area and re-press rather than letting dirt collect underneath.
Style pairing tips (so it doesn’t look out of place)
- Match the emblem finish to nearby accents: chrome with chrome, dark trim with dark accents when possible.
- Keep it symmetrical: if the car already has offset model lettering, consider balancing on the opposite side.
- Less can look more: one well-placed badge often looks cleaner than multiple small additions.
- Coordinate with other subtle upgrades: valve caps, plate frame, or a single interior accent—avoid overcrowding.
A helpful rule: if the badge competes with the factory roundel/star/four rings or makes the rear end look “busy,” move it to a quieter area or switch to an interior placement where it reads as a detail only you (and passengers) notice.
When to skip an emblem sticker
Product picks (in stock)
- 3D Metal LIMITED EDITION Emblem Sticker for BMW, Audi, Mercedes-Benz — a simple visual upgrade for smooth exterior or interior surfaces.
- 3-in-1 Bottle Gap Cleaner Brush — useful for cleaning around trim seams and tight edges before installing adhesive-backed accessories.
- Portable Eye Massager — a convenient comfort add-on for long commutes or post-drive downtime.
FAQ
Will an emblem sticker damage car paint when removed?
Removal is typically paint-safe if done gently. Warm the adhesive, peel slowly at a low angle, then clean any residue with a paint-safe adhesive remover instead of scraping with hard tools.
Can it be used on the exterior in rain and sun?
It’s intended for vehicle use, including normal exposure to weather. Long-term results depend on good surface prep, avoiding harsh chemicals, and not aiming high-pressure water directly at the emblem edges.
Where is the easiest place to install it for a clean look?
Flat, smooth areas like the trunk/boot panel or a smooth interior trim strip are easiest. These spots allow full adhesive contact and make it simpler to align the emblem straight.


Leave a comment