


Jeep Renegade Headrest Button Cover: Replace & Refresh
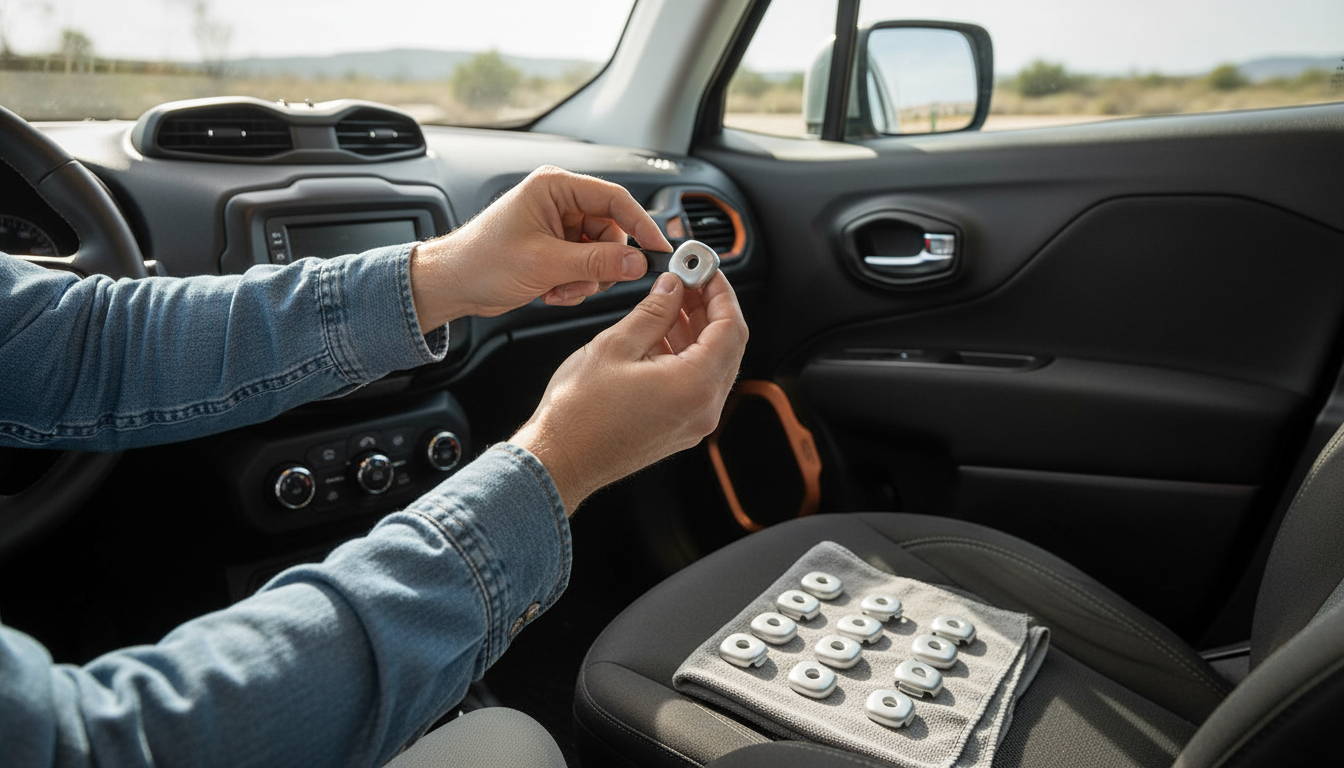
Jeep Renegade Seat Headrest Adjusting Button Cover
A missing or worn headrest adjust button cover can make the seatback look unfinished and can leave the button area exposed to scratches and grime. Replacing the cover is a small interior fix that restores a clean look and helps protect the headrest release/adjust area from everyday wear. It’s a simple way to bring the seat trim back to “factory-finished” without replacing larger seat components.
For drivers who routinely adjust head restraints for comfort or for different passengers, keeping the button surround protected also helps prevent scuffs from rings, fingernails, backpacks, and car seats brushing the area.
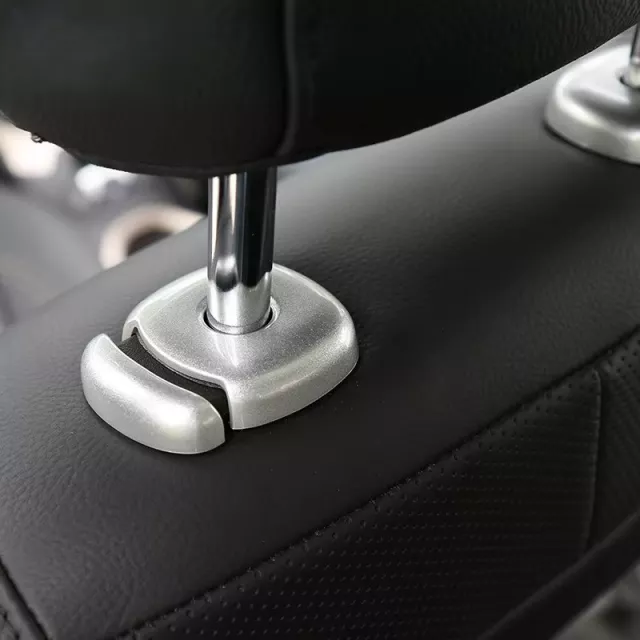
What the headrest adjust button cover does
- Covers the headrest release/adjust button area on the seat to keep the trim looking complete.
- Helps shield the button surround from scuffs caused by hands, bags, and routine seat adjustments.
- Reduces the chance of dust and debris collecting around the button opening.
- Improves interior appearance after a cover cracks, pops off, or goes missing.
Head restraints play an important role in occupant protection, so it’s worth keeping the adjustment area tidy and functioning smoothly. For background on why head restraints matter and how they’re intended to work, see guidance from the NHTSA and the Insurance Institute for Highway Safety (IIHS).
When it’s time to replace the cover
- The cover is cracked, loose, or no longer sits flush against the seat trim.
- The button area feels sharp or catches on clothing during headrest adjustments.
- Visible discoloration, peeling, or heavy scratching that stands out from the rest of the interior.
- A previous repair used tape or glue that looks messy or interferes with smooth button operation.
A cover that won’t stay seated can also create small noises over bumps. If the button still works but the trim looks rough, replacing the cover is usually the cleanest solution.
Fit check before ordering
- Confirm the cover location: seat headrest adjustment/release button area (not the seat recline lever or the headrest posts themselves).
- Compare the shape and orientation of the existing opening and clip points (if the old cover is available) to product photos.
- Check whether the cover is intended for a specific seat position (driver/passenger or front/rear) if the vehicle uses different trims.
- If the original cover is missing, inspect the seat trim for any broken tabs that could prevent a secure snap-fit.
Quick compatibility checklist
| Check | What to look for | Why it matters |
|---|---|---|
| Seat location | Front seat headrest button area vs. other seat controls | Avoids ordering a similar-looking trim piece for another area |
| Opening shape | Match outline/edges to the seat trim opening | Ensures the cover sits flush and doesn’t rock |
| Mounting method | Clips/tabs/snap points present and not broken | Determines whether the cover will lock in place |
| Color/finish | Compare to interior trim tone (black/gray variants can differ) | Helps the replacement blend with surrounding surfaces |
Installation overview
- Park on a flat surface and move the seat to a comfortable working position with good access to the button area.
- Clean the surrounding trim so grit doesn’t get trapped under the new cover.
- Align the cover with the opening and press evenly until it seats; avoid forcing one corner first if it uses multiple tabs.
- Test the headrest adjust/release action after installation to confirm the button moves freely and returns normally.
- If resistance is felt, remove and re-seat the cover to check alignment rather than pressing harder.
If the cover uses multiple snap points, applying even pressure across the face prevents stress marks and reduces the chance of bending or breaking a tab.
Care and cleaning
- Wipe with a microfiber cloth to prevent fine scratches on the cover’s surface.
- Use mild interior cleaner; avoid harsh solvents that can dull plastic finishes.
- Keep the seam around the cover free of crumbs and debris to maintain a tight fit.
- During routine detailing, verify the cover remains fully seated and doesn’t shift.
For tight seams around seat controls, a small detailing brush can help lift debris before wiping. If you like a dedicated tool for narrow gaps, consider adding a 3-in-1 Bottle Gap Cleaner Brush to your interior cleaning kit.
Common issues and quick fixes
- Cover won’t snap in: Re-check orientation and confirm no broken seat-trim tabs are blocking the fit.
- Cover sits proud or uneven: Remove, clean the mating surface, and re-install with even pressure across the face.
- Button feels sticky after installation: The cover may be slightly misaligned; re-seat to ensure the button has clearance.
- Rattling or looseness: Inspect for missing clips/tabs; if the seat trim itself is damaged, the cover may not lock securely.
Product details at a glance
If the missing piece is specifically the trim around the headrest release/adjust button, the Jeep Renegade Seat Headrest Adjusting Button Cover is designed as a straightforward replacement that restores a finished look. It’s a practical refresh after normal wear, accidental damage, or when the original cover goes missing.
Listing information
| Item | Value |
|---|---|
| Product | Jeep Renegade Seat Headrest Adjusting Button Cover |
| MPN | 48802 |
| Price | 23.82 USD |
| Availability | In stock |
FAQ
Will the headrest still adjust normally after installing the cover?
Yes, as long as the cover is properly aligned and fully seated. After installation, press the button and move the headrest to confirm smooth travel and that the button returns normally.
Do tools or adhesives need to be used?
Typically no—most covers are designed to clip or snap into place. If a cover seems to require glue to stay on, double-check for broken mounting tabs or an incorrect fit.
What should be checked if the cover feels loose?
Inspect the seat trim opening for cracked or missing retaining tabs, clean the contact surfaces, and re-seat the cover evenly. Looseness is often caused by damaged mounting points or debris preventing a tight snap-fit.


Leave a comment